
What you get
One box that is both halves
Most streamers are one thing: a player that needs a library somewhere else, or a library that needs a player somewhere else. This is both at once — your music collection, which appears in the app to browse, and the renderer that plays it. The phone only points at things. Lock it, close the app, walk out of the room: the music keeps going, because it never ran through the phone.
What makes it different
- It brings the network with itOther Raspberry Pi music distributions fall back to a hotspot when they cannot find a router — it is a rescue hatch for configuring them. Here it is the point. The network has a name and a password you set before the card ever enters the Pi, and it is how you are meant to listen: on a train, on a plane, in a garden.
- It is not a DAC, on purposeYou bring your own and keep the sound you chose. A Mojo, a DragonFly, a desktop converter — all fine. With none attached it falls back to the Pi's headphone jack, so it never vanishes from your app.
- It shows your whole library, AIFF includedServers built on minidlna cannot read AIFF; the format list is compiled in. On a real collection we measured it: of 14,596 files it listed 961 — essentially only the ones that were not AIFF, and it looked perfectly healthy — covers, albums, years. This server has no index of its own. It reads the player's database, so it cannot know fewer formats than the player does.
- Nothing is altered on the way outNo resampling, no software volume, no loudness matching. And you do not have to take our word for it — there is a command below that prints what is actually leaving the machine.
- You never open a terminalNot once. Write the card, edit one text file on it, plug things in, open the app. Every command anywhere on this page belongs to either the optional self-check or the build-it-by-hand route — the six steps need none of them.
- No account, no cloudThe image is free. Nothing phones home. The app is a subscription or a one-time purchase.
Six steps. You can also jump straight to any of them from the list on the right.
What you need
- A Raspberry PiModel 3, 4, 5 or Zero 2 W. A Pi 3 is plenty — nothing is computed here, only read and passed along. A Pi 4 adds USB-C, which makes running it from a power bank easier.
- A power supply that gives enoughPi 3: at least 2.5 A. Pi 4 and 5: 3 A. With a short, thick cable — thin charging leads drop so much voltage that too little arrives.
- A microSD card8 GB is enough. Only the system goes here, not the music.
- Your musicOn a USB stick or a second card in an adapter. Everything common is read: FLAC, AIFF, ALAC, WAV, MP3, AAC, DSD, WavPack.
- Optional: your DACAny USB converter Linux recognises — which is practically every one that works without drivers on a computer.
Step 1 of 6
Write the card
You need one free program, made by the Raspberry Pi people themselves. It copies the image onto the card — a card cannot simply be dragged into, it has to be written.
- Download for macOS
- Open your Downloads folder and double-click
imager_latest.dmg. - A small window opens with two icons. Drag the Raspberry Pi Imager icon onto the Applications folder next to it. That is the whole installation — nothing to unpack, nothing to run.
- Close the window. In the Finder sidebar there is now an entry called Raspberry Pi Imager with an eject symbol — click the eject symbol.
- Open Applications and double-click Raspberry Pi Imager. The first time, macOS asks whether you are sure. Click Open.
- Download for Windows
- Open your Downloads folder and double-click
imager_latest.exe. - Click through the installer. Windows may ask whether the program may make changes — yes.
- Start Raspberry Pi Imager from the start menu.
- Install it with your package manager:
sudo apt install rpi-imageron Debian or Ubuntu. - Or download the AppImage, make it executable (
chmod +x) and run it. - Start Raspberry Pi Imager.
Two different files, do not mix them up. The .dmg, .exe or .AppImage above is just the program, and which one you take depends on the computer you are sitting at. sita-transport.img.xz — the image linked at the top of this page — is the image: the same single file for everyone, because it does not run on your computer at all. It goes onto the card and boots on the Pi.
All three come from raspberrypi.com/software, the official page. Now put your microSD card into the computer — in a card reader, or the built-in slot if your machine has one — and start the Imager. It shows three fields:
- Device: your Pi model.
- Operating system: scroll to the bottom and choose Use custom, then pick
sita-transport.img.xz— the file you fetched from the link at the top of this page. - Storage: your microSD card.
Do not open the settings gear. The Imager offers to set a user name, a password and Wi-Fi for you. This image brings its own, and the gear would overwrite them. If the Imager asks whether to apply customisation settings, answer no.
Then let it write. That takes a few minutes.
If the card slips out and the process breaks off: simply start again. A half-written card does no harm, it just will not boot.
Step 2 of 6
Set your names
You do not put this file there — it is already on the card. sita.txt ships inside the image and is written along with it.
One catch: the Imager ejects the card when it has finished verifying, so the volume disappears from your desktop. Pull the card out and put it straight back in. A volume called bootfs then appears, and sita.txt is lying in it. Open it with any text editor — TextEdit, Notepad, whatever you have. This is the entire configuration, and it is easier to do now than later.
WLAN_NAME— what the device's own network is called in your phone's Wi-Fi list.WLAN_PASSWORT— at least 8 characters.GERAETENAME— what it is called in the app, as a library and as a player.WARTUNGS_PASSWORT— for the maintenance account, namedsita. You will not need it in normal use.
You may leave every password blank. The device then generates one on first boot and writes it back into this same file. Put the card in your computer any time to read it. What it will never do is leave a password empty — the box sits on your home network, and anyone who reaches that network would otherwise reach the Pi.
Save the file, eject the card.
Step 3 of 6
First boot
Card into the Pi, power on. For this one boot, use an Ethernet cable — the device installs the rest of itself now, and that needs internet exactly once. Afterwards, never again.
It takes a few minutes. The red light only means power is present; the green one flickers while work is happening.
Everything else happens by itself. The device installs the player, the media server, the DAC detection and its own Wi-Fi, and then removes that startup job so it never runs again. There is nothing to type, no script to start, no login — you are looking at a blinking light, not at a screen.
How you know it worked: open Song in the Air on your phone. The name you set in GERAETENAME appears in the list, twice. If it does not, give it another minute — and then read If it sticks.
Step 4 of 6
Add your music
Plug in your USB stick. That is all.
The Pi mounts it by itself — read-only, so nothing breaks when you pull it out — and hands the music to the player. If the drive holds a folder called Music or Musik, it takes that one; otherwise the whole drive.
Large collections take a while the first time. Browsing by folder works immediately, while album and artist views are still filling in — so if you swap the stick and want to hear something now, you wait for nothing.
Why anything has to be read at all: to sort by album and artist, every file has to be opened once. That happens exactly once, not twice — the server keeps no database of its own, it asks the player. That was a deliberate decision: a second pass would mean waiting twice and twice as much that can go wrong.
Step 5 of 6
Add your DAC
Plug your converter into a USB port. The Pi recognises it and points the output at it, while running, without a reboot. Unplug it and attach a different one and the same thing happens again.
With nothing attached it uses the built-in headphone jack. The device therefore never disappears from your app just because nothing is plugged in.
Please do not charge your DAC from the Pi. A headphone amplifier taking a charge draws more current than the Pi can give. The voltage for the whole device then collapses and it restarts. Attached for playback is fine — attached for charging is not.
Step 6 of 6
Play from your phone
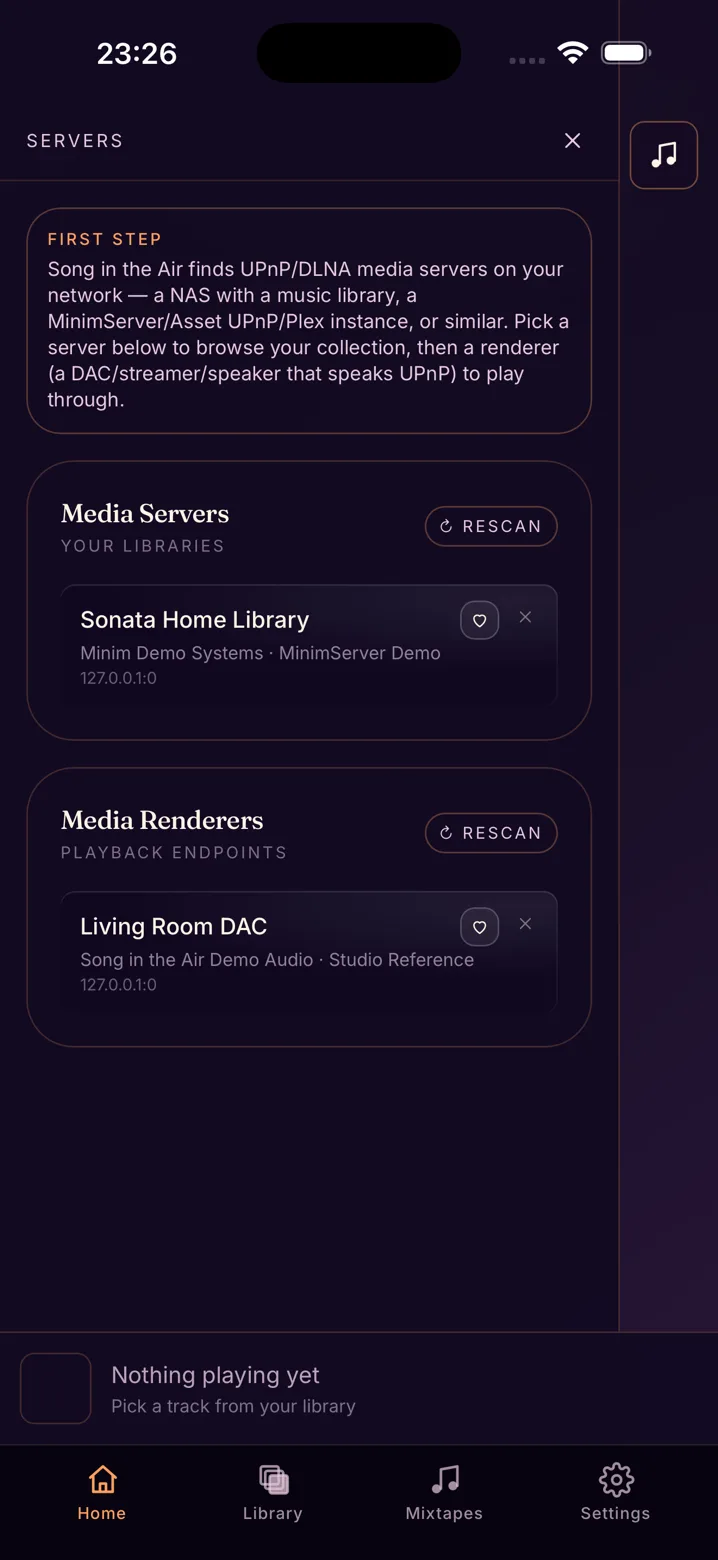
Open Song in the Air. The device appears twice, and that is correct:
- as a server — where you browse your music,
- as a renderer — where the sound comes out.
Select both, tap a track. From here the phone is only a remote: lock it, close the app, leave the room — the music continues, because it never ran through the phone.
The actual point
On the road, with no network at all
This is what the whole thing was built for. The Pi opens its own wireless network under the name you set. Your phone joins it like any other Wi-Fi, with the password from sita.txt.
After that everything is as it is at home, only without a router in between. No internet needed, no hotel Wi-Fi, no captive portal asking for your room number. It works on a train, on a plane and in a garden.
With an Ethernet cable attached, both run in parallel: you reach the device over the house network and over its own. Nothing to switch.
Help
If it sticks
The Pi keeps restarting, or suddenly disappears
A USB stick and a DAC both draw their current from the Pi. If the supply cannot carry all three, the voltage sags and the Pi restarts. What you see is the network connection dropping or the music stopping — the cause is one layer below that, in the power, not in the software.
One command settles it:
vcgencmd get_throttledIf it answers throttled=0x0, all is well. Anything else means the Pi has been getting too little. The most common cause is a device hanging off the Pi to charge. Otherwise: stronger supply, shorter cable.
The renderer is missing from the app
Server there, player not? First check that your phone is on the same network as the Pi — the house network or the Pi's own, not the router's guest network.
If that does not help, a restart does:
sudo systemctl restart mpd sita-server 'upmpdcli@*'Tracks are missing although they are on the stick
Most likely it is still reading. Ask how far along it is:
mpc statsIf the number of songs is still climbing, simply wait. If it has stopped and something is still missing, please write to us with the file format — that is exactly what the first version of this build failed at, and we want to know.
I swapped the stick
Nothing to do. Pull it out, put the new one in, the rest happens by itself.
Check us
Verify it yourself
The Pi converts nothing. It reads the file, unpacks it and passes the bitstream to your converter unchanged — no sample rate adjustment, no volume in software, no loudness matching. What was on the disk arrives at the DAC.
You can check that during playback:
cat /proc/asound/card*/pcm0p/sub0/hw_paramsIt prints the sample rate and bit depth actually leaving the machine. Compare them with the file. If they match, the chain is clean — and you do not have to believe anyone about it, including us.
Optional · you do not need this
Building it by hand instead
Skip this unless you want it. The six steps above are the whole build. The two commands below are exactly what the image runs for you on its first boot, written out — they are here so that you can read what the device does to itself before you trust it, and for anyone who would rather put this on a Pi they already run.
In that case you start from a stock Raspberry Pi OS Lite install rather than our image.
In that case you do use the Imager's settings gear: give yourself a user name and password, enable SSH, and enter your home Wi-Fi if you are not using a cable. Then connect and run:
sudo bash 01-transport.sh
sudo bash 02-hotspot.sh
They take a few minutes and talk to you while they work. There is nothing to decide — unless the Pi reports it is not getting enough current, in which case read If it sticks before continuing. At the end there is a list of ticks.
Questions
Questions
Does it need internet?
Once, during the first boot, while it finishes installing itself. Never again after that.
Do I need a Mac? Do I need an iPhone?
No Mac. The card is written from Windows, macOS or Linux alike — the image is one file that runs on none of them, it runs on the Pi.
The app is iPhone-only today, and we say so plainly. But the transport is not locked to it: it announces itself as an ordinary UPnP server and renderer, so any UPnP control point can drive it — BubbleUPnP or mconnect on Android, Kazoo on a desktop, whatever you already use. You lose our app, not the device.
Does it work with servers other than this one?
Yes — the app talks to standard UPnP and DLNA servers — tested with Synology, MinimServer and Asset UPnP. The transport is one option, not a requirement.
What does it cost?
The image is free, with no account. The app is a subscription with a free trial, or a one-time purchase; the App Store shows prices and terms.
Anything else?
What is not here belongs in an email to crb@createbetter.design — including the ones that start with "this is probably a stupid question". Those usually show that we described something badly. More answers are in the help.